Send your first broadcast
Choose an audience and a sender, write the email with merge variables, preview it against a real contact, send a test, then send or schedule it.
A broadcast is one email sent to everyone on a contact list. The editor walks through three steps that unlock in order, then you preview, test, and send.
Before you start:
- Email sending is set up: a verified domain and at least one active, verified sending address. Without one, the Broadcasts page shows "Sending isn't set up yet" and nothing can go out.
- A contact list that is not still being built.
- A role with Send broadcasts.
The three steps
Go to Email → Broadcasts and click New broadcast. Each step collapses to a one-line summary once it is complete.
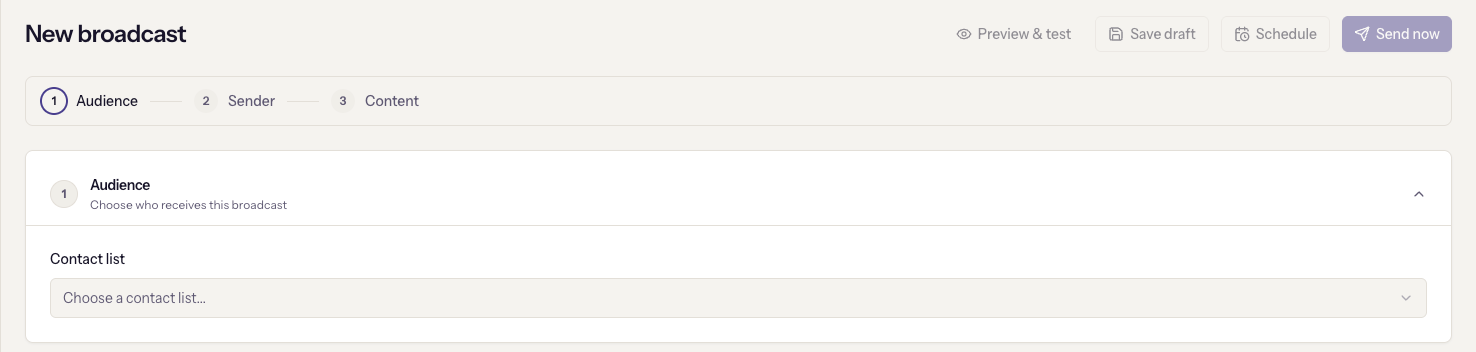
1. Audience
Pick a Contact list. The editor shows "Sending to approximately N contacts. Suppressed addresses are filtered at send time." The number is approximate for two reasons: membership is resolved when the broadcast sends, and anyone who has unsubscribed, bounced, or complained is removed at that moment.
2. Sender
Pick a Sending channel, which is the From address recipients see, and enter a Reply-to email. Replies go straight to that mailbox; they do not come back into ClientSphere.
A channel marked (unverified) can be selected but the editor warns that sends may fail. Fix it in email sending first.
3. Content
- Internal name is for your team. Recipients never see it.
- Subject and Body are the email. The body is a visual editor: click a block to edit it, or click Start from template to load a designed starter you can rearrange.
Merge variables
The Merge variables panel under the body inserts a placeholder that is filled in per recipient. Click into the subject or a text block first, then click the variable.
| Recipient | Sender and broadcast |
|---|---|
{{firstName}} {{lastName}} {{email}} {{jobTitle}} {{company}} | {{senderName}} {{senderFirstName}} {{senderEmail}} {{companyName}} {{currentDate}} |
Add a fallback with a pipe for values that may be blank:
{{firstName|there}} renders as "there" when the contact has no first name.
Use one in the subject line every time; a subject that reads "Hi ," is the
most common broadcast mistake.
Variables only go into text, heading, and button blocks. If you click one with nothing selected the editor says so.
Preview and test
Click Save draft, then Preview & test.
- Choose a preview contact from the list. The subject and body render with that person's real values, and the sender context you are using.
- Send a test to your inbox. Enter your address and click Send test. This is one real email with the selected contact's merge values. It always goes out, even in sandbox mode, and it does not count in the report.
Test at least once with a contact who has a blank first name, so you see your fallbacks working.
Send now
Send now opens a confirmation showing From, Reply-to, Subject, and the
approximate recipient count. Type SEND in the box to enable the button.
Once sending starts the broadcast is read-only. You can watch progress on the report page and stop it there if you need to.
Schedule
Schedule asks for a date and time and sends automatically. Two things the dialog says that are easy to miss:
- The time is in your device's timezone, shown in the dialog. If your workspace spans timezones, check the confirmation line "Sends on …" before you confirm.
- Recipients are chosen when it sends, not now. A list that grows between scheduling and sending goes out to the larger list. The report page repeats this while the broadcast is scheduled.
A scheduled broadcast can still be edited; saved changes go out with it. Choosing a new time replaces the schedule, and Cancel schedule on the report page puts it back to draft.
Stop a send in flight
On the report page, Stop sending appears while the status is sending. The dialog tells you how many have already been sent, and that those cannot be recalled. Everyone not yet sent is cancelled. The batch currently in flight finishes first, so a few more may go out before it halts.
Read the report
The report shows Sent, Delivered, Opened, Bounced, Complained, and Suppressed, with a per-recipient table you can filter by outcome. Two things to know:
- Sent and Delivered are different. Sent means the email was handed to delivery; Delivered means the recipient's server accepted it.
- Treat open rate as a trend, not a count. Privacy proxies fetch tracking pixels automatically, so some opens are not people.
Bounced and complained addresses are added to the suppression list and will not receive future broadcasts. See Unsubscribes and bounces.
When it goes wrong
- "Sending isn't set up yet." No sending address is both verified and active. An admin fixes this under Settings → Email sending; the notice says so for non-admins too.
- Send now and Schedule are greyed out with the hint "Save draft to unlock Send". Save first.
- The preview button says "Pick a contact list first" or "Pick a sending channel first". Complete that step.
- "Wait Ns" on the test button. Tests have a short cooldown between sends.
- The broadcast shows failed. Open it; the report page shows the reason. A failed broadcast stays editable, so you can fix the cause and send again.
- "This broadcast has been sent, so it is read-only." Duplicate it from the broadcasts list to send something similar.